
At Twigby, we want to make managing your account as easy as possible. With Twigby, you have all the tools necessary to access and manage your account. You can manage your Twigby account with our App or through our website. There are a variety of changes a Twigby Customer can make within their account. Update your plan, turn hotspot on or off, view your usage, and much more! Keep reading to learn about many of the useful tools you have available to get the most out of your Twigby Service.
Update your Plan
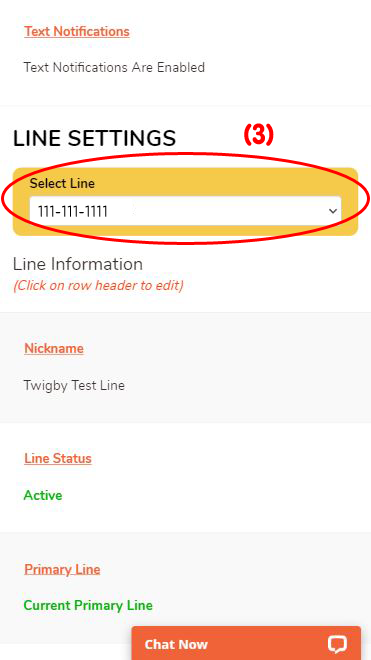
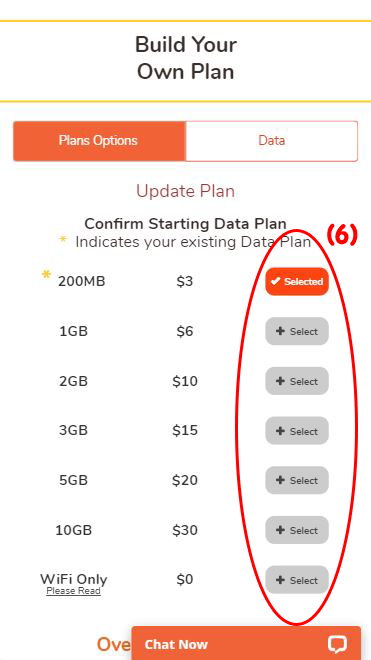
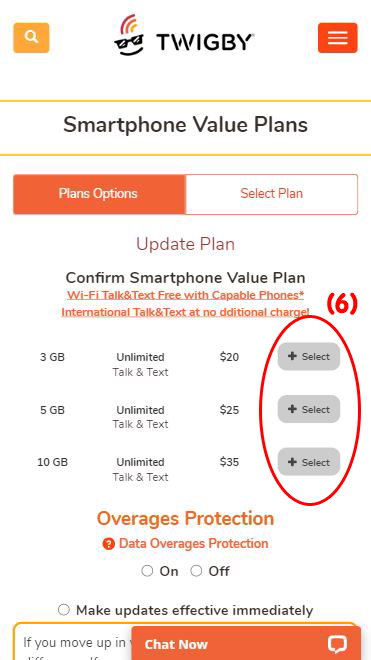
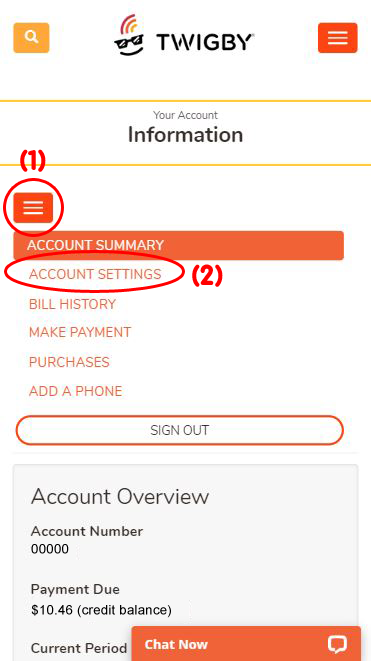
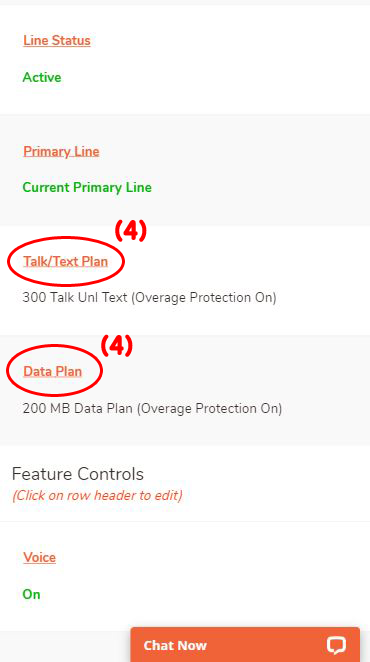
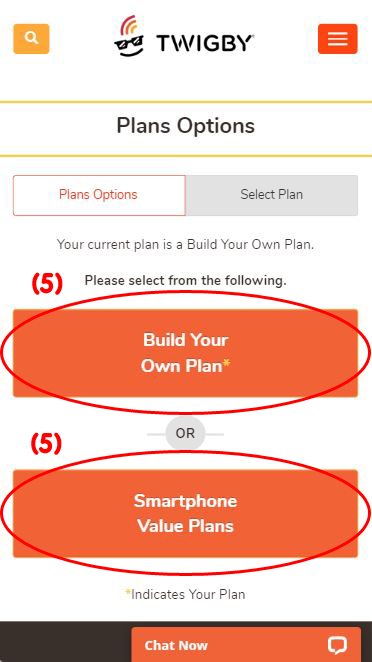
We all know that our plan usage can change from month to month. You might find yourself needing more minutes or data than you usually do from one month to the next. That’s why we made sure that updating your plan is simple and done within just a few steps. Upon logging into your account, click the menu button (1) and go to the Account Settings page (2). Scroll down to Line Settings, and select the line you wish to make changes for from the drop-down menu (3). To change plans, click on either “Talk/Text Plan” or “Data Plan” (4). Next, choose if you want to Build Your Own Plan or choose from our Smartphone Value Plans (5). Then, update your plan by selecting how much data or minutes you want (6). Choose to have Overage Protection on or off (7) and select when the change will be effective (8). Then, save your changes by selecting “Continue” (9).


View your Usage
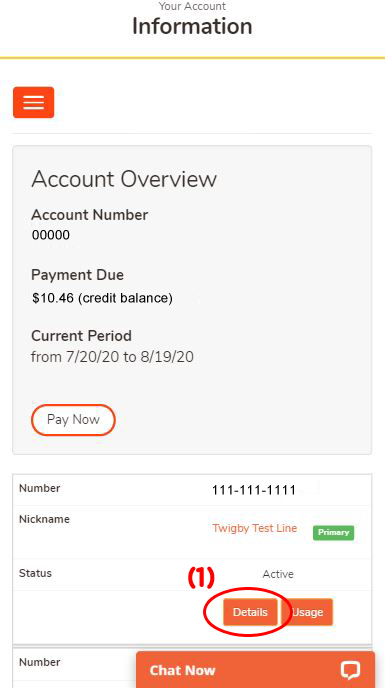
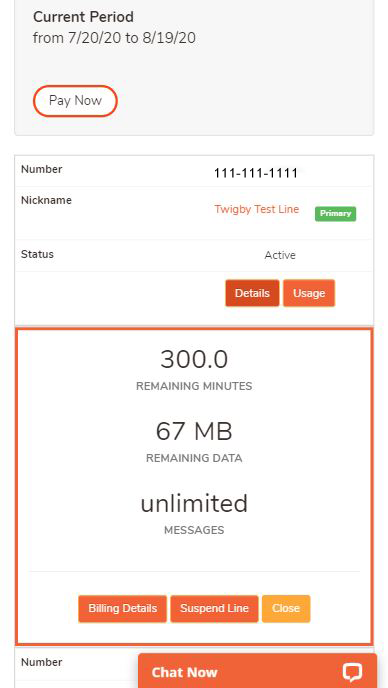
There are two ways that Twigby Customers can easily keep track of monthly usage. In Account Summary, click “Details” for the appropriate line to view how much voice and data you have remaining in the current billing period (1).
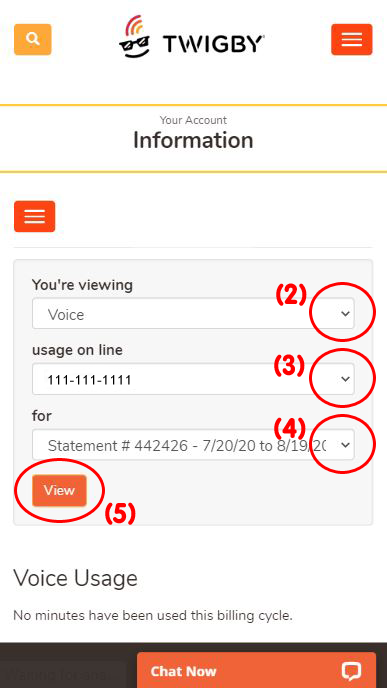
If you wish to view your usage consumption, click “Usage” (1). You are then prompted to choose if you want to see voice, text, or data usage (2). If you have multiple lines on the account, choose your line (3). Then, choose the statement you’d like to see usage for (4) and click “View” (5). Learn more about usage by clicking here.

Twigby Overage Protection
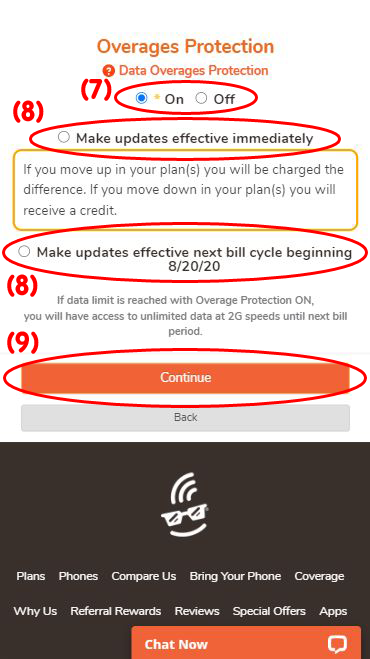
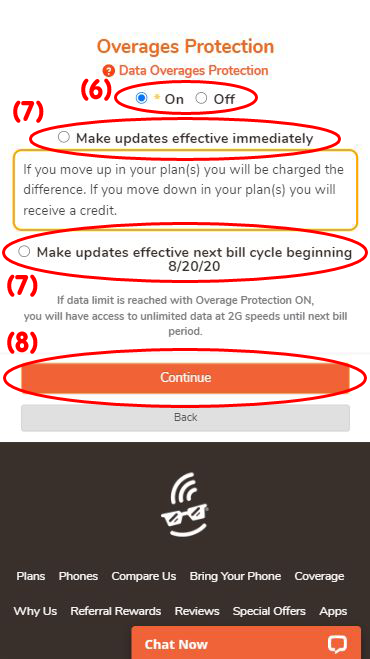
Overage Protection is a great tool to keep on to better monitor and understand your usage. However, turning Overage Protection off is also helpful when you think you may need to move into the next minute or data plan from time to time. To turn Overage Protection on or off for your minute or data plan, you will first need to click the menu button (1) and go to the Account Settings page (2). Scroll down to Line Settings, and select the line you wish to update Overage Protection for (3). Choose whether you want to update Overage Protection for your Talk/Text Plan or the Data Plan (4). Select whether your current plan is a Build Your Own Plan or Smartphone Value Plan (5). Then, scroll down a bit and you will be able to turn Overage Protection on or off (6). Next, choose when the updates should be effective (7). Select “Continue” to save your changes (8). Click here to learn more about Overage Protection.

Make a Payment
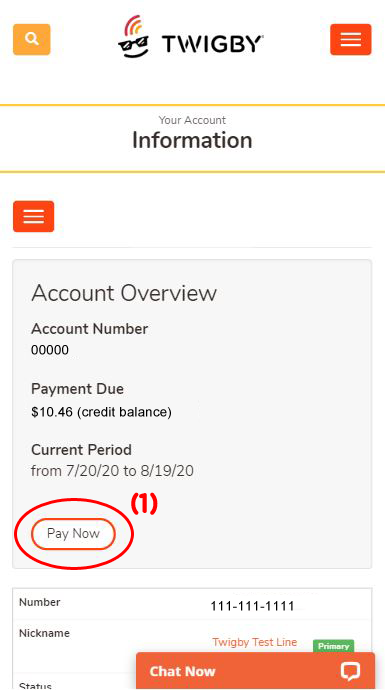
For your convenience, there are two ways to pay for your Twigby service. After logging into your account, you are taken to the Account Summary page. You will be able to make a payment there by selecting “Pay Now” (1).
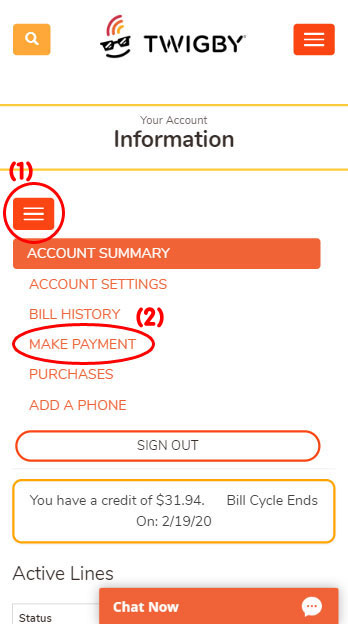
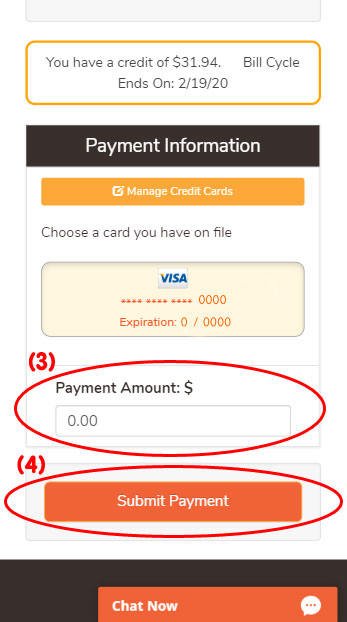
The other way to make a payment is by opening the menu (1) and choosing “Make Payment” (2). Next, enter your payment amount (3) and choose “Submit Payment” (4). Please note that all accounts are set up on auto bill pay. If you choose to make a manual payment without having a payment due, it will reflect as a credit on your account. To learn how Twigby billing works, click here.
Update Account PIN
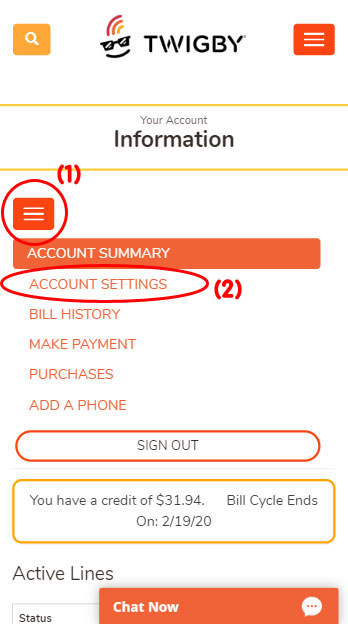
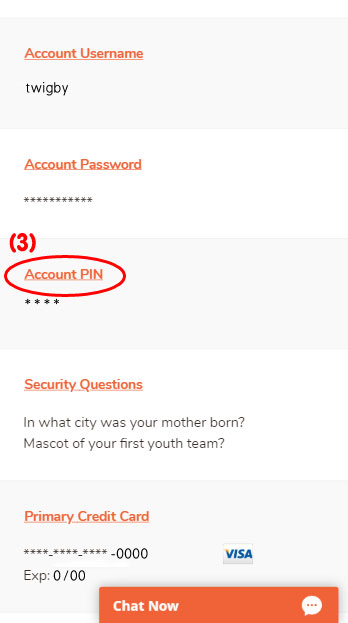
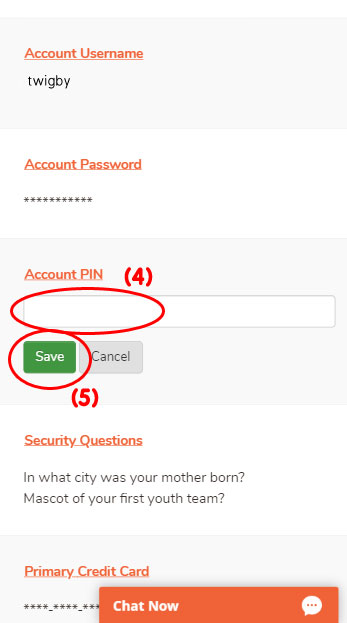
The PIN on your account ensures your Twigby account is protected and secure. It’s very important to know your PIN as it is used for account verification whenever you chat with our Customer Support Team. If you would like to change your account PIN, select the menu button (1) and choose “Account Settings” (2). Select “Account PIN” (3), enter your new 4-digit PIN (4), and click “Save” (5). To learn more about your account PIN, click here.
Add a Credit Card
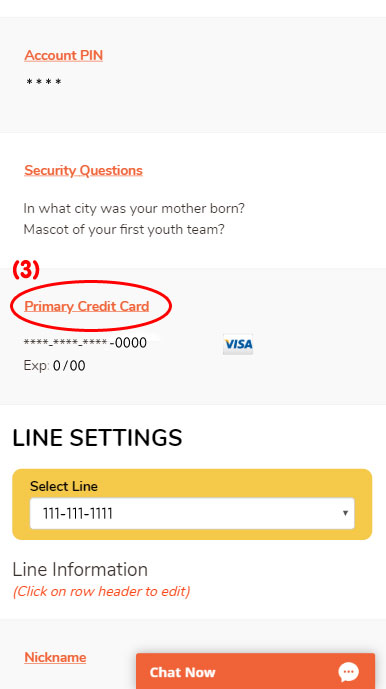
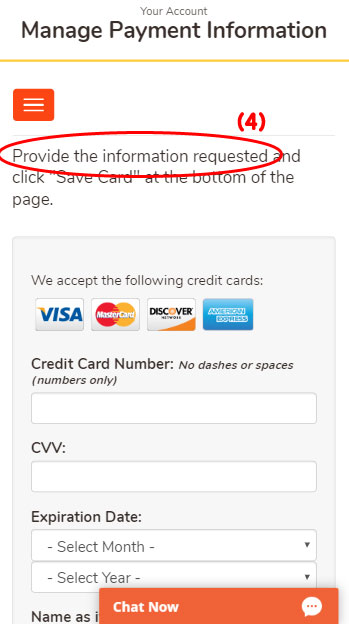
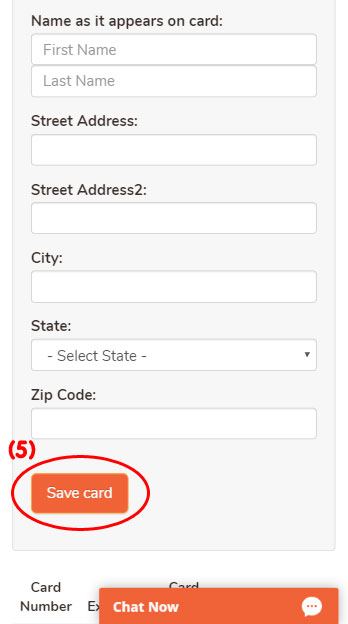
A card must always be stored in your Twigby account. If your credit card is about to expire or compromised, you will need to add a new card within your Twigby account. To add a credit card to your account, select the menu button (1) and choose “Account Settings” (2). On the Account Settings page, select “Primary Credit Card” (3) and complete the information for the new card (4). Then click “Save Card” (5). To learn more about managing your credit cards on file, click here.
Turn Data Off or Back On
Many customers find the ability to turn data off useful for restricting usage on kid’s phones. Simply go to “ACCOUNT SETTINGS”. If you do not see it, tap on the orange menu icon. Then select “Data Access” to turn off data. You can turn data back on whenever you are ready to have it on again. Please note that this will only impact cellular data and not block access to available wi-fi networks.
Turn Mobile Hotspot Off or Back On
Turning mobile hotspot off and on is easily done by going to the “ACCOUNT SETTINGS”. If you do not see “ACCOUNT SETTINGS”, tap on the orange menu icon. Next, choose “Mobile Hotspot”. After selecting “Mobile Hotspot”, you will choose to confirm your selection. Please note that all eligible phones will automatically have this feature set to on. To learn more about Mobile Hotspot and how to turn it on in your phone’s settings, click here.
Managing your Account to Best Fit your Needs
We know our customers value the customization of their plan and all of its features and settings. That is why we let you take account customization to the next level by allowing you to manage your account anywhere at any time, putting the control of your wireless phone service back into your hands.